The Cuisinart Air Fryer Toaster Oven is a versatile 3-in-1 appliance combining an air fryer, toaster oven, and more, offering healthy cooking with less oil and even results․
1․1 Overview of the Appliance and Its Versatility
The Cuisinart Air Fryer Toaster Oven is a multi-functional appliance that combines air frying, baking, broiling, and toasting capabilities․ Its compact design and versatility make it ideal for cooking a variety of dishes with minimal oil, offering crispy results and even cooking․ Perfect for home chefs seeking convenience and healthier meal options․
1․2 Key Benefits of Using the Cuisinart Air Fryer Toaster Oven
The Cuisinart Air Fryer Toaster Oven offers healthier cooking with less oil, crispy results, and even heat distribution․ Its multi-function design streamlines cooking, saving space and time․ Perfect for air frying, baking, and broiling, it delivers delicious meals while reducing oil consumption, making it a practical and versatile addition to any kitchen․

Key Features and Components of the Cuisinart Air Fryer Toaster Oven
This appliance features a wide temperature range up to 450°F, multiple cooking functions, and removable parts like the air fryer basket, baking tray, and crumb tray for easy cleaning․
2․1 Temperature Range and Cooking Functions
The Cuisinart Air Fryer Toaster Oven offers a temperature range up to 450°F, enabling versatile cooking methods․ It features multiple functions, including air fry, bake, broil, and toast, with precise temperature control for even cooking results․ The appliance also supports convection cooking and warming, ensuring a wide range of culinary possibilities with consistent performance․
2․2 Removable Parts: Air Fryer Basket, Baking Tray, and Crumb Tray
The Cuisinart Air Fryer Toaster Oven features removable parts, including the air fryer basket, baking tray, and crumb tray, all designed for easy cleaning․ The crumb tray is positioned at the bottom for effortless food residue removal․ The air fryer basket is used with the baking tray to optimize cooking results and prevent mess․
2․3 Rack Positions and Their Uses
The Cuisinart Air Fryer Toaster Oven features adjustable rack positions, optimizing cooking performance․ Position 2 includes a 50-stop feature for easy access․ Racks can be removed and reordered to accommodate various cooking needs, ensuring even cooking and browning․ Refer to the manual for suggested rack placements for specific functions like baking or air frying․

Setting Up and Installing the Cuisinart Air Fryer Toaster Oven
Setting up the Cuisinart Air Fryer Toaster Oven involves unboxing, positioning on a heat-resistant surface, and thorough cleaning before initial use to ensure safety and efficiency in your cooking experience․
3․1 Unboxing and Initial Setup
When you unbox the Cuisinart Air Fryer Toaster Oven, ensure all components, including the air fryer basket, baking tray, and crumb tray, are removed and washed before first use․ Place the oven on a stable, heat-resistant surface, away from water and direct heat sources․ Always refer to the manual for proper setup and safety guidelines․
3․2 Proper Placement and Installation
Place the Cuisinart Air Fryer Toaster Oven on a stable, heat-resistant countertop, ensuring at least 4-6 inches of clearance from walls and other appliances for proper ventilation․ Avoid installing near water sources or direct sunlight․ Position the oven away from flammable materials and ensure it is not submerged in water to prevent damage․
3․3 Initial Cleaning Before First Use
Before first use, clean the Cuisinart Air Fryer Toaster Oven thoroughly․ Wipe the exterior with a damp cloth and mild dish soap․ For the interior, use a soft sponge and gentle detergent, avoiding abrasive cleaners․ Rinse and dry all parts, including the crumb tray and air fryer basket, which are dishwasher-safe․ Ensure the oven is completely dry before initial use․
Basic Operations and Controls
The Cuisinart Air Fryer Toaster Oven’s basic operations involve turning it on, selecting the desired function, setting the timer, and adjusting the temperature for precise and easy control every time․
4․1 Turning On the Appliance and Understanding the Dials
To turn on the Cuisinart Air Fryer Toaster Oven, ensure it’s plugged into a working outlet and the power cord is securely connected․ The ON/Oven Timer and ON/Toaster Timer dials control cooking modes, temperature, and time․ Refer to the manual for dial settings guidance and troubleshooting tips;
4․2 Using the Function Dial for Different Cooking Modes
The function dial allows you to select cooking modes like Air Fry, Bake, Toast, and Broil․ Simply rotate the dial to your desired mode and adjust settings using the temperature and timer controls․ Refer to the manual for specific mode instructions and troubleshooting tips to ensure optimal performance․
4․3 Adjusting the Temperature and Timer
Adjust the temperature using the dial, with settings up to 450°F (232°C), to suit your recipe․ Set the timer to control cooking duration, ensuring dishes are cooked to perfection․ Always refer to the manual for specific timing and temperature guidelines to achieve the best results for various cooking modes․

Cooking Functions and Modes
The Cuisinart Air Fryer Toaster Oven offers multiple cooking modes, including Air Fry, Bake, Broil, and Toast, allowing for versatile and customizable cooking experiences with precision control․
5․1 Air Fry Mode: Crispy Results with Less Oil
The Air Fry Mode uses hot air circulation to achieve crispy results with minimal oil․ It’s ideal for frying favorites like fries and chicken․ Use the function dial to select Air Fry, then set the temperature up to 450F․ Place food in the air fryer basket for even cooking․ Monitor closely to avoid burning, and experiment with seasonings for enhanced flavor․
5․2 Bake Mode: Even Cooking for Various Dishes
The Bake Mode offers even cooking for a variety of dishes, from roasted vegetables to baked goods․ Select Bake using the function dial, set the desired temperature up to 450F, and monitor progress for consistent results․ Perfect for dishes requiring precise temperature control, ensuring evenly cooked meals every time with minimal effort․
5․3 Broil Mode: Perfect for Browning and Caramelization
The Broil Mode uses high heat to achieve perfect browning and caramelization, enhancing flavors in dishes like meats, fish, and vegetables․ Set the temperature and timer, place food on the rack, and monitor closely to avoid overcooking․ Ideal for achieving a crispy exterior while maintaining juiciness․
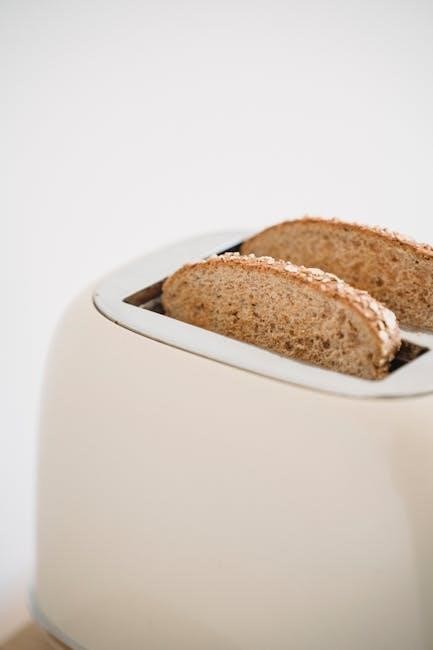
5․4 Toast Mode: Customizable to Your Preference
The Toast Mode allows for customizable browning, ensuring your toast is cooked to your desired shade․ Perfect for bagels, English muffins, or slices of bread, it delivers even results every time․ Adjust the timer for lighter or darker toast and monitor closely to avoid burning․ Ideal for achieving your perfect crispiness․

Safety Precautions and Best Practices
Always follow safety guidelines to ensure safe operation․ Keep the appliance away from water, heat sources, and flammable materials․ Avoid using metal utensils or non-stick pans inside․ Never leave cooking unattended, and keep children away․ Properly preheat and monitor cooking to prevent burns or fires․
6․1 Placement and Usage Guidelines
Place the appliance on a stable, heat-resistant surface, ensuring proper ventilation․ Keep it away from heat sources, water, and flammable materials․ Avoid overcrowding the countertop․ Always ensure the crumb tray is in place to catch debris․ Use oven mitts when handling hot parts, and never leave cooking unattended․
6․2 Avoiding Common Safety Hazards
To ensure safe operation, avoid placing the appliance near water or open flames․ Never submerge it in liquid or use damaged cords․ Keep children away during operation․ Avoid overheating by not covering vents․ Use oven mitts to handle hot racks or trays, and never leave cooking unattended․
6․3 Handling Hot Parts and Avoiding Burns
Always use oven mitts or tongs to handle hot racks, trays, or baskets․ Avoid touching the appliance’s exterior or interior during operation․ Keep children away from hot surfaces․ Never leave cooking unattended, as food can burn quickly․ Refer to the manual for additional tips on safe handling and burn prevention․

Cleaning and Maintenance
Regularly clean the interior, exterior, and removable parts after use․ The crumb tray and air fryer basket are dishwasher-safe․ Wipe the non-stick interior gently to maintain its coating․
7․1 Cleaning the Interior and Exterior
Regular cleaning ensures optimal performance․ Wipe the interior with a damp cloth after cooling․ Use a soft sponge for tough stains, avoiding abrasive cleaners․ Clean the exterior with a damp cloth and dry thoroughly to prevent water spots․ Remove and wash racks and trays as needed․
7․2 Maintaining the Crumb Tray and Air Fryer Basket
The crumb tray slides out for easy cleaning; wash with soap and water․ The air fryer basket is dishwasher-safe but can also be hand-washed․ Dry thoroughly after cleaning to prevent rust․ Regular maintenance ensures optimal performance and hygiene; Clean both parts after each use to prevent food residue buildup․
7․3 Tips for Long-Term Maintenance
Regularly clean the interior and exterior to prevent grease buildup․ Avoid using abrasive cleaners or scrubbers, as they may damage surfaces․ Check for food residue and wipe down after each use․ Ensure proper ventilation to maintain even heating․ Always follow the user manual’s guidelines for care and maintenance to extend the appliance’s lifespan․
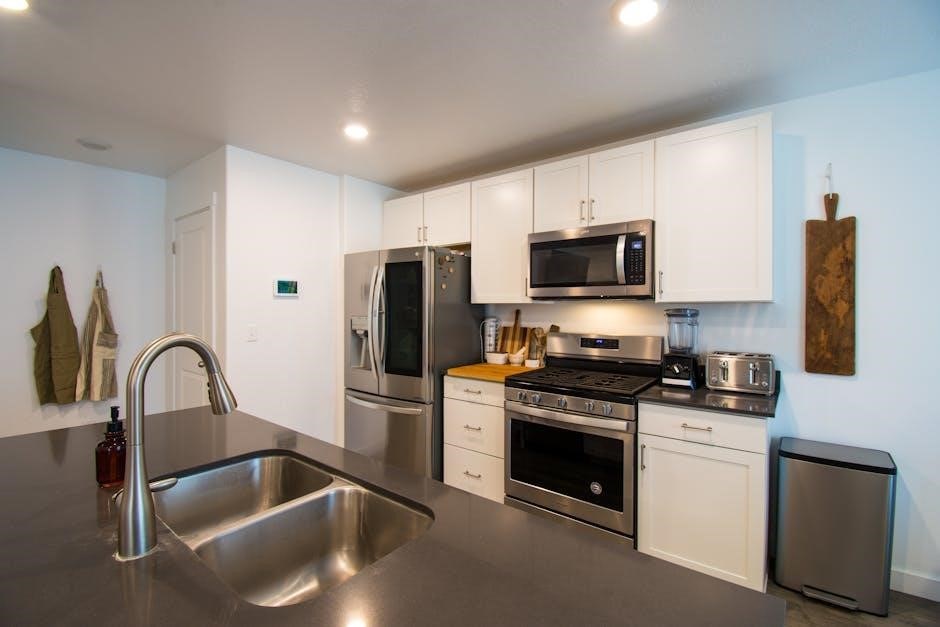
Accessories and Additional Features
The Cuisinart Air Fryer Toaster Oven comes with a crumb tray, air fryer basket, and baking tray for versatile cooking․ Optional accessories, like extra racks, enhance functionality․
8․1 Included Accessories and Their Uses
The Cuisinart Air Fryer Toaster Oven includes a crumb tray, air fryer basket, and baking tray․ These accessories are dishwasher-safe, ensuring easy cleaning․ The air fryer basket optimizes air circulation for crispy results, while the baking tray is perfect for even cooking․ Together, they enhance cooking versatility and performance․
8․2 Optional Accessories for Enhanced Cooking
Optional accessories like non-stick trays, tongs, and silicone mats can enhance your cooking experience․ These tools help prevent food from sticking, making cleanup easier and improving overall performance․ They are designed to work seamlessly with the Cuisinart Air Fryer Toaster Oven, offering versatility for various recipes and cooking techniques․
Troubleshooting Common Issues
Common issues include the appliance not turning on, uneven cooking, or malfunctioning parts․ Check power connections, ensure proper food placement, and refer to the manual for solutions․
9․1 Appliance Not Turning On
If the Cuisinart Air Fryer Toaster Oven won’t turn on, ensure it’s properly plugged into a working outlet․ Verify the power cord is securely connected and the outlet is functioning․ Check the ON/OFF dial is set correctly․ Consult the manual or contact customer support if issues persist after these checks․
9․2 Uneven Cooking or Burning
If experiencing uneven cooking or burning, ensure food is placed correctly and not overcrowded․ Adjust temperature and timer settings as needed․ Monitor cooking progress closely, especially in Air Fry mode, as burning can occur quickly․ Proper rack positioning and food distribution are key to achieving consistent results․
9․3 Malfunctioning Parts or Noises
If unusual noises occur, check for loose parts or improper installation․ Ensure the appliance is on a stable surface․ Verify electrical connections are secure․ If parts malfunction, refer to the manual or contact customer support for assistance․ Regular maintenance and proper usage can prevent such issues․

Advanced Tips for Optimal Use
Preheat the oven for consistent results, monitor cooking progress, and experiment with new recipes․ Use liners for easy cleanup and refer to the manual for specific guidance․
10․1 Preheating for Better Results
Preheating ensures even cooking and crispy results․ Set the desired temperature and allow 5-7 minutes for the oven to heat up․ This step is crucial for achieving optimal texture and browning․ Always monitor the preheating process to avoid overheating․ A well-preheated oven guarantees consistent outcomes for air frying, baking, and broiling․
10․2 Monitoring Cooking Progress
Regularly monitoring your cooking progress ensures optimal results․ Use the oven light to check food without opening the door, preventing heat loss․ For air frying, shake the basket halfway through cooking․ Adjust timings as needed, especially for delicate foods․ This ensures even cooking and prevents overcooking or burning․ Stay attentive for best outcomes․
10․3 Experimenting with New Recipes
The Cuisinart Air Fryer Toaster Oven encourages culinary creativity․ Try new recipes by exploring its versatile functions, from crispy air-fried vegetables to perfectly baked meats․ Experiment with different temperature settings and cooking modes to achieve unique flavors․ Refer to the manual for tips and inspiration to maximize your cooking experience and explore endless possibilities․
Capacity and Size Considerations
The Cuisinart Air Fryer Toaster Oven offers varying capacities, such as the TOA-65 and TOA-95 models, catering to different cooking needs․ Choose a size that fits your space and food quantity requirements for optimal performance․
11․1 Understanding the Cooking Space
The Cuisinart Air Fryer Toaster Oven offers ample cooking space, accommodating various dish sizes․ Models like the TOA-65 and TOA-95 provide interior capacities suited for cooking multiple servings or large items like whole chickens․ The oven’s dimensions ensure efficient use of kitchen space while allowing for versatile meal preparation․
11․2 Choosing the Right Size for Your Needs
Selecting the right size depends on your kitchen space and cooking needs․ Models like the TOA-65 and TOA-95 offer varying capacities, catering to small families or larger gatherings․ Measure your kitchen space and consider the types of dishes you’ll prepare to ensure the appliance fits both your cooking and storage requirements․
The Cuisinart Air Fryer Toaster Oven is a must-have for modern kitchens, combining versatility, healthier cooking, and ease of use, making it a great addition for home chefs to explore new recipes and enjoy delicious meals․
12․1 Final Thoughts on the Cuisinart Air Fryer Toaster Oven
The Cuisinart Air Fryer Toaster Oven is a versatile, efficient, and user-friendly appliance that excels at air frying, baking, and broiling․ Its ability to cook evenly with minimal oil makes it a healthier alternative, while its compact design saves kitchen space․ Users praise its ease of use and consistent results, making it a valuable addition to any home kitchen․
12․2 Encouragement to Explore More Recipes and Features
Experiment with new recipes and explore various cooking modes to unlock the full potential of your Cuisinart Air Fryer Toaster Oven․ Discover the versatility of air frying, baking, and toasting, and take your cooking to the next level with creative and delicious meals;

Where to Find Manuals and Additional Resources
Visit Cuisinart’s official website or manualslib․com for detailed manuals, troubleshooting guides, and recipe ideas․ Explore models like TOA-65 and TOA-95 for specific instructions and tips․
13․1 Official Cuisinart Manuals and Guides
Access official manuals and guides for Cuisinart Air Fryer Toaster Ovens on their website or manualslib․com․ These resources provide detailed instructions for models like TOA-65 and TOA-95, covering setup, cooking functions, safety tips, and troubleshooting for optimal use․
13․2 Online Communities and Troubleshooting Forums
Join online communities and forums like Reddit’s r/AirFryer or r/Cuisinart for troubleshooting tips․ These platforms offer user-generated solutions, recipe ideas, and real-world insights․ Engage with fellow users to resolve common issues or optimize your cooking experience with the Cuisinart Air Fryer Toaster Oven․