Welcome! This manual serves as a comprehensive guide for your Exmark Lazer Z‚ offering detailed instructions for operation‚ maintenance‚ and troubleshooting.
Understanding this manual ensures safe and efficient use‚ maximizing the lifespan and performance of your professional mowing equipment.
It’s designed to help you quickly become familiar with all aspects of your new Exmark Lazer Z‚ from initial setup to routine servicing procedures.
Overview of the Lazer Z Series
The Exmark Lazer Z series represents a pinnacle of zero-turn mowing technology‚ engineered for professionals and discerning homeowners demanding exceptional performance and durability. These machines are renowned for their robust construction‚ featuring heavy-duty frames and powerful engines‚ delivering unmatched cutting speed and precision.
The Lazer Z line encompasses a variety of models‚ each tailored to specific needs‚ offering diverse deck sizes and engine options. From compact units ideal for residential properties to larger‚ more powerful machines suited for expansive commercial landscapes‚ there’s a Lazer Z to tackle any mowing challenge.
Key features across the series include hydrostatic transmissions for smooth‚ responsive control‚ and innovative cooling systems designed to prevent overheating during prolonged use. Exmark prioritizes operator comfort‚ incorporating ergonomic controls and adjustable seating. This overview provides a foundation for understanding the capabilities and benefits of your Exmark Lazer Z.
Safety Precautions
Prioritizing safety is paramount when operating the Exmark Lazer Z. Always read and thoroughly understand this owner’s manual before attempting to start or operate the machine. Wear appropriate personal protective equipment (PPE)‚ including safety glasses‚ hearing protection‚ and sturdy footwear‚ at all times.
Keep bystanders‚ especially children and pets‚ clear of the mowing area. Never operate the mower while under the influence of drugs or alcohol. Inspect the mowing area for obstacles that could be thrown by the blade.
Be aware of potential hazards such as uneven terrain‚ hidden objects‚ and slopes. Never attempt to operate the machine on excessively steep inclines. Always disengage the blades and parking brake before leaving the operator’s seat. Regular maintenance and inspections are crucial for safe operation.

Understanding Your Machine
Familiarization is key! This section details the Exmark Lazer Z’s core components‚ functions‚ and model-specific features for optimal performance.
Key Components and Their Functions
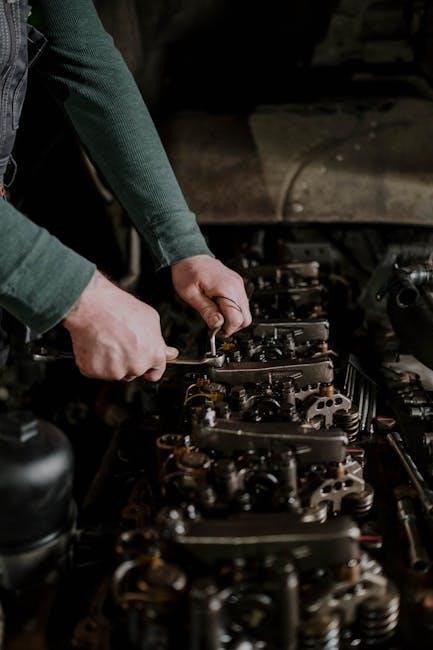
The Engine: Powering the Lazer Z‚ the engine’s performance dictates mowing capability. Regular checks of oil levels‚ air filters‚ and fuel systems are crucial for longevity.
The Mowing Deck: Constructed from heavy-duty steel‚ the deck houses the blades and determines the cut quality. Understanding blade engagement and deck leveling is essential.
The Blades: These are the cutting tools‚ requiring frequent sharpening and inspection for damage. Proper blade balance ensures smooth operation and prevents vibration.
The Drive System: Hydrostatic transmissions provide smooth‚ variable-speed control. Maintaining proper fluid levels and inspecting belts are vital for reliable operation.
The Operator Control Panel: Featuring intuitive controls for speed‚ height adjustment‚ and blade engagement‚ it’s the central hub for machine operation. Familiarize yourself with each function.
The Cooling System: Preventing overheating is critical. Regularly inspect the cooling fins and ensure adequate airflow for optimal engine performance and extended life.
Identifying Model-Specific Features

Deck Size Variations: Lazer Z models offer diverse deck sizes‚ impacting maneuverability and mowing speed. Confirm your specific deck width for optimal performance.
Engine Options: Different models feature varying engine horsepower and brands. Knowing your engine type is crucial for maintenance and parts replacement.
Seat Adjustments: Enhanced operator comfort is achieved through adjustable seats. Familiarize yourself with the adjustment mechanisms for a personalized fit.
Control Lever Configurations: Some models feature unique control lever layouts. Understand your machine’s specific configuration for intuitive operation.
Tire Types: Different tire options – smooth or treaded – affect traction and turf compatibility. Select tires appropriate for your mowing environment.
Specialized Attachments: Certain Lazer Z models support optional attachments. Verify compatibility and proper installation procedures before use.

Operation Instructions
Begin with safety! Always inspect the machine before starting. Follow the detailed steps for starting‚ mowing‚ and safely stopping the engine each time.
Starting and Stopping the Engine
Starting Procedure: Before each use‚ ensure the parking brake is engaged and the blades are disengaged. Check the oil and fuel levels‚ confirming adequate supply for operation. Turn the ignition switch to the ‘ON’ position‚ allowing the system to self-check. Engage the choke if the engine is cold‚ and then firmly press the start button. Allow the engine to warm up before applying a load.
Stopping Procedure: To safely stop the engine‚ disengage the blades and slowly reduce the throttle. Allow the engine to idle for a short period to cool down. Once idling‚ turn the ignition switch to the ‘OFF’ position. Always remove the key to prevent accidental starting. Ensure the parking brake remains engaged until the machine is fully stationary. Following these steps will ensure safe operation and prolong the engine’s life.
Mowing Techniques for Optimal Results
Overlap and Speed: For a professional-quality cut‚ overlap each mowing pass by approximately 3-4 inches. Maintain a consistent ground speed‚ adjusting to the terrain and grass density. Avoid excessively fast speeds‚ as this can compromise the cut quality and potentially damage the turf.

Cutting Patterns: Alternate mowing patterns with each cut to promote healthy grass growth and prevent compaction. Consider using a crosshatch pattern for optimal results. When mowing slopes‚ always mow across the slope‚ never up and down‚ to prevent rollovers. Regularly inspect the discharge chute to ensure it remains clear of obstructions. Proper technique ensures a beautiful‚ healthy lawn.
Adjusting Cutting Height
Height Adjustment Levers: The Exmark Lazer Z utilizes convenient height adjustment levers‚ typically located on the mower deck. These levers allow for precise and easy adjustments to the cutting height without requiring tools. Ensure the machine is level and the blades are disengaged before making any adjustments.
Height Increments: Cutting heights are usually adjustable in small increments‚ often ranging from 1 to 5 inches. Select the appropriate height based on grass type and desired finish. Regularly check the deck leveling to maintain a consistent cut across the entire width of the mower. Proper height adjustment is crucial for a healthy‚ well-maintained lawn.

Maintenance Schedule
Regular upkeep is vital for optimal performance and longevity of your Exmark Lazer Z. Following a consistent schedule ensures reliable operation and minimizes downtime.
Daily Maintenance Checks
Before each use‚ perform a quick inspection of your Exmark Lazer Z to ensure safe and efficient operation. Begin by checking the oil level‚ adding if necessary‚ and verifying there are no leaks. Inspect the fuel level and check for any fuel leaks around the engine and fuel lines.
Examine the blades for damage – cracks‚ bends‚ or excessive wear – and ensure they are securely fastened. Check the tire pressure; proper inflation contributes to a smoother cut and improved handling. Visually inspect the deck for any obstructions or accumulated debris‚ removing anything that could interfere with mowing.
Finally‚ confirm all safety devices‚ including the operator presence system (OPS)‚ are functioning correctly. A proactive approach to these daily checks will help prevent unexpected breakdowns and extend the life of your machine.
Regular Service Intervals
To maintain peak performance‚ adhere to a scheduled service plan for your Exmark Lazer Z. Every 25 hours‚ inspect and clean the air filter‚ replacing it if excessively dirty. After 50 hours‚ change the engine oil and filter‚ and grease all lubrication points. A thorough inspection of the drive system – belts‚ pulleys‚ and idlers – should also occur at this interval.
Every 100 hours‚ check and adjust the blade balance‚ and inspect the cooling fins for debris. Additionally‚ examine the fuel lines and connections for wear or damage. Annually‚ or every 200 hours‚ replace the spark plug and inspect the battery for corrosion‚ cleaning terminals as needed.
Following these intervals ensures longevity and minimizes potential downtime.
Blade Sharpening and Replacement
Maintaining sharp blades is crucial for a clean cut and healthy turf; Regularly inspect blades for dullness‚ nicks‚ or damage. Sharpening can be done with a file or a blade grinder‚ ensuring proper balance after each sharpening to prevent vibration. An unbalanced blade can cause excessive wear and potential damage to the mower deck.
If blades are severely damaged‚ bent‚ or cracked‚ they must be replaced immediately. Always use genuine Exmark replacement blades‚ ensuring compatibility with your Lazer Z model. When installing new blades‚ tighten them to the manufacturer’s specified torque.
Proper blade maintenance significantly impacts mowing quality and machine health.

Troubleshooting Common Issues
This section details solutions for typical problems‚ including engine failures‚ deck and blade concerns‚ and drive system malfunctions‚ ensuring quick resolutions.
Engine Problems
Engine failure to start can stem from several causes. First‚ verify the fuel level and ensure the fuel shut-off valve is open. Check the spark plug for fouling or damage‚ replacing if necessary. A clogged air filter restricts airflow‚ hindering combustion; clean or replace it promptly.
Low oil levels trigger safety shutdowns – always maintain the correct oil level as specified in the manual. If the engine starts but runs rough‚ suspect a carburetor issue. Consult a qualified technician for carburetor cleaning or repair.
Overheating may indicate a faulty cooling system or excessive debris buildup. Inspect the cooling fins for obstructions and ensure proper airflow. Regularly check the engine’s exhaust system for blockages. Always refer to the owner’s manual for specific engine troubleshooting guidance and safety precautions before attempting any repairs.

Deck and Blade Issues
Uneven cutting often points to dull or damaged blades. Sharpen or replace blades as needed‚ ensuring they are balanced to prevent vibration. Check for debris buildup under the deck‚ which can obstruct airflow and affect cut quality. A bent or damaged deck can also cause uneven cutting; inspect for structural damage.
Excessive vibration frequently indicates unbalanced blades or a loose blade spindle. Tighten all blade spindle bolts and verify blade balance. Inspect the deck for any signs of damage or wear.
Blade engagement problems may stem from a faulty belt or a malfunctioning blade clutch. Examine the belt for wear or breakage and the clutch for proper operation. Always disconnect the spark plug wire before working on the deck or blades for safety.
Drive System Concerns
Loss of traction can occur on slippery surfaces or due to worn drive belts. Ensure proper tire inflation and check belts for wear and tension. Adjust the drive belt tension according to the manufacturer’s specifications. Consider using appropriate tires for the terrain.
Difficulty steering might indicate a problem with the steering linkage or hydraulic system. Inspect the steering linkage for looseness or damage and check the hydraulic fluid level. Bleed the hydraulic system if necessary.
Unusual noises from the drive system could signal a failing wheel bearing or a damaged gearbox. Inspect wheel bearings for play and listen for grinding sounds. Check gearbox oil level and condition. Always consult a qualified technician for complex repairs.

Parts and Accessories
Genuine Exmark parts ensure optimal performance and longevity. Explore available accessories – from mulching kits to protective covers – enhancing your Lazer Z’s capabilities.
Locating Replacement Parts
Ensuring the longevity of your Exmark Lazer Z requires access to genuine replacement parts; Exmark prioritizes making this process straightforward for owners. The most reliable method is through authorized Exmark dealers‚ who maintain extensive inventories and can provide expert advice on selecting the correct components.
Alternatively‚ you can utilize the Exmark website’s parts lookup tool. This online resource allows you to identify parts specific to your machine’s model and serial number‚ streamlining the ordering process. When ordering‚ always have your model and serial number readily available to guarantee compatibility.
For assistance‚ consult your local Exmark dealer or refer to the parts diagrams within this owner’s manual. Using genuine Exmark parts is crucial for maintaining the machine’s performance‚ safety‚ and warranty validity. Avoid using non-approved substitutes‚ as they may compromise the quality and reliability of your Lazer Z.
Recommended Accessories
To enhance your Exmark Lazer Z’s performance and versatility‚ consider several recommended accessories. A mulching kit significantly improves lawn health by finely chopping clippings and returning nutrients to the soil. Blade overlap kits optimize cutting performance‚ particularly in challenging terrain or with varying grass types.
For operator comfort‚ armrests and suspension seats reduce fatigue during extended mowing sessions. A debris deflector helps contain clippings and prevents them from being discharged onto unwanted surfaces. Protective covers safeguard your investment during storage.
Exmark also offers a range of maintenance accessories‚ including oil filters‚ air filters‚ and belts‚ ensuring your machine remains in peak condition. Always refer to your owner’s manual for compatibility and proper installation instructions. Utilizing these accessories maximizes efficiency and extends the life of your Lazer Z.
Warranty Information
Your Exmark Lazer Z is backed by a comprehensive warranty‚ protecting against defects in materials and workmanship. The specific terms and duration vary depending on the model and components. Generally‚ the machine features a limited warranty covering manufacturing flaws for a defined period from the original purchase date.
The warranty excludes normal wear items‚ such as blades‚ belts‚ and tires‚ as well as damage resulting from improper maintenance‚ misuse‚ or accidents. Registration of your machine within a specified timeframe is often required to validate warranty coverage.
For detailed warranty information‚ including specific coverage details and claim procedures‚ please refer to the separate warranty document included with your Exmark Lazer Z. Retain this document for future reference and contact an authorized Exmark dealer for any warranty-related inquiries.