The GE Oven Self-Cleaning Feature uses high temperatures to burn food residue, leaving ashes for easy disposal. This efficient process minimizes manual cleaning efforts significantly.
What is the Self-Cleaning Oven?
A self-cleaning oven is a feature in GE ovens that uses high temperatures, typically around 880°F, to burn food residue into ashes. This eliminates the need for harsh chemicals or manual scrubbing. The oven door locks during the cycle to ensure safety, and the process leaves behind a manageable amount of ash that can be easily wiped away. This innovative feature simplifies oven maintenance, making it a convenient option for homeowners who want to keep their ovens clean without tedious effort. The self-cleaning function is designed to handle tough grime and food buildup efficiently, ensuring a sparkling clean interior after each cycle.
Benefits of Using the Self-Cleaning Mode
Using the self-cleaning mode on your GE oven offers several advantages. It eliminates the need for harsh chemicals, reducing exposure to toxic fumes and making the process safer. The high-temperature cycle effectively burns food residue into ash, simplifying cleanup. This feature also saves time, as it automates the cleaning process, allowing you to focus on other tasks. Additionally, it helps maintain the oven’s appearance and hygiene, ensuring a clean interior without manual scrubbing. Overall, the self-cleaning mode provides a convenient, efficient, and environmentally friendly way to keep your oven in pristine condition, enhancing both functionality and longevity.

Preparation for the Self-Cleaning Cycle
Before starting, remove racks and accessories, clean large debris, and ensure the oven door is closed. Protect surrounding areas from potential ash and heat exposure.
Steps to Prepare the Oven
- Remove all racks, shelves, and accessories from the oven to prevent damage during high heat.
- Wipe down the oven interior with a damp cloth to remove loose food particles and debris.
- Ensure the oven door is fully closed and latched to maintain high temperatures during the cycle.
- Cover the floor and surrounding surfaces with old sheets or newspaper to catch any ash or debris.
- Turn off any nearby ventilation systems to allow the self-cleaning process to work effectively;
Proper preparation ensures a safe and efficient self-cleaning cycle, minimizing mess and potential damage.
Removing Oven Racks and Accessories
To prepare for the self-cleaning cycle, remove all oven racks, shelves, and accessories. These items can warp or discolor due to extreme heat during cleaning. Place them in soapy water for manual cleaning. Use oven mitts to handle racks, as they may be hot. Ensure no aluminum foil or utensils remain inside, as they can melt or damage the oven. Cleaning racks separately prevents damage and ensures the self-cleaning process runs smoothly. Always refer to the GE Oven Manual for specific instructions on removable parts. This step is crucial for safe and efficient cleaning.
Protecting the Surrounding Area
To ensure safety and prevent damage during the self-cleaning cycle, clear the area around the oven of flammable materials. Cover countertops and floors with heat-resistant mats or old towels to catch debris. Use a plastic sheet or old sheets to protect the floor from ash and food residue. Open windows or turn on the exhaust fan for ventilation to avoid harmful fumes. Keep children and pets away, as the oven door locks during cleaning. Remove any hanging items like curtains near the oven to prevent fire hazards. Consider using heat-resistant covers for nearby surfaces like the backsplash and cabinets. After the cycle, wear gloves and use a damp cloth or small vacuum to safely dispose of ashes.

Safety Precautions
Always follow critical safety measures when using the self-cleaning feature. Avoid covering oven slots or using flammable materials nearby. Keep the area well-ventilated to prevent fume buildup.
Important Safety Instructions
When using the self-cleaning feature on your GE oven, it is crucial to follow safety guidelines to avoid accidents and damage. Never cover oven slots or use flammable materials nearby, as high temperatures can ignite them. Ensure proper ventilation in the kitchen to prevent harmful fumes from accumulating. Do not force the oven door open during the cleaning cycle, as it may damage the lock mechanism. Keep children and pets away from the oven while it is in operation. Always remove racks and accessories before starting the cycle to prevent warping. If the oven malfunctions, turn it off and disconnect power immediately. These precautions ensure safe and effective cleaning.
What Not to Do During the Cycle
Do not open the oven door or interfere with the latch during the self-cleaning cycle, as high temperatures can cause burns. Avoid using commercial oven cleaners, as they may damage the oven’s finish. Never use abrasive scrubbers or harsh chemicals, as they can scratch the interior. Do not leave the oven unattended while the cycle is running. Keep the surrounding area clear of flammable materials, such as towels or curtains. Refrain from using the oven for cooking during the cleaning process. Do not attempt to clean the oven racks or accessories while the cycle is active. These precautions ensure a safe and effective cleaning process.

Operating the Self-Cleaning Feature
Activate the self-cleaning mode by setting the controls to the Clean position. The oven heats to high temperatures, burning food residue into ashes for easy cleanup later.
Starting the Self-Cleaning Cycle
To initiate the self-cleaning cycle on your GE oven, ensure the oven door is closed and all racks are removed. Turn the oven temperature knob to the Clean position or select the Self Clean option via the digital controls. If your model has a latch release button, press and hold it while sliding it into the clean position. The oven will lock automatically to ensure safety during the high-temperature cleaning process. Set the timer according to the recommended duration, typically between 2 to 4 hours, depending on soil level. The oven will heat to extremely high temperatures, burning food residue into ashes. Do not open the door during the cycle, as it will remain locked for safety.
Setting the Controls Correctly
To set the controls correctly for the GE oven self-cleaning cycle, start by ensuring the oven door is closed and locked. Locate the temperature knob and turn it to the Clean position. For models with digital controls, select the Self Clean option from the menu. Choose the appropriate cleaning duration based on the level of soil inside the oven, typically ranging from 2 to 4 hours. If your model has a latch release button, press and hold it while sliding it into the clean position. Once all settings are confirmed, initiate the cycle by pressing Start or turning the knob to begin. Ensure no racks or accessories are inside the oven during the cycle. Always refer to your specific model’s manual for precise instructions.
Understanding the Cleaning Process
Understanding the GE oven self-cleaning process involves high heat, which reaches up to 880 degrees Fahrenheit, effectively burning food residue into ash. The cycle duration varies from 2 to 4 hours, depending on soil level. Once initiated, the oven door locks automatically to ensure safety during the intense heat phase. After the cycle completes, let the oven cool before wiping out the ash. This method eliminates the need for harsh chemicals, making it efficient and eco-friendly. Always follow the recommended cleaning time and ensure the oven is empty of racks and accessories for optimal results. Proper use ensures a clean oven with minimal effort.

Post-Cleaning Maintenance
After the self-cleaning cycle, allow the oven to cool. Wipe away ash with a damp cloth. Dispose of ashes safely. Avoid using harsh chemicals to maintain the finish.
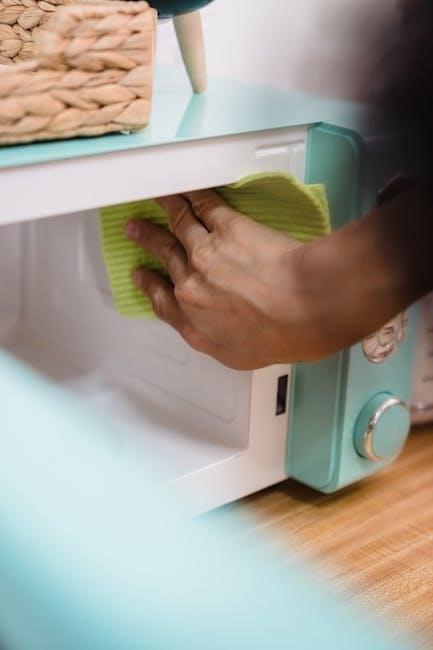
Cooling Down and Wiping the Oven
After the self-cleaning cycle, turn off the oven and let it cool completely. Once cooled, wipe the interior with a damp cloth to remove ash and residue. Avoid using abrasive cleaners or scourers, as they may damage the finish. For tougher spots, a soft sponge or paper towels can be used. Ensure all surfaces are clean before restarting the oven. Do not use commercial oven cleaners, as they may harm the self-cleaning liner. Regular wiping after cooling helps maintain the oven’s condition and prevents residue buildup. Always refer to the owner’s manual for specific cleaning recommendations.
Disposing of Ashes Safely
After the self-cleaning cycle, allow the oven to cool completely before handling any ashes. Use a damp cloth or paper towels to collect the ashes, ensuring they are fully cooled to avoid burns. Avoid inhaling ash particles by keeping the area well-ventilated. Dispose of the ashes in a sealed container or plastic bag to prevent spreading; Do not flush ashes down drains, as they may cause plumbing issues. If using a vacuum, ensure it has a fine-particle filter to trap ash. Always wear gloves and a mask for protection. Check local regulations for guidance on safe disposal methods. Proper disposal helps maintain a clean and safe kitchen environment.
Troubleshooting Common Issues
If the self-cleaning cycle malfunctions, turn off the oven and disconnect power. Ensure all controls are set correctly and avoid using commercial cleaners, which can damage the finish. Contact a qualified technician if issues persist for professional assistance and to maintain safety.
What to Do If the Cycle Malfunctions
If the self-cleaning cycle malfunctions, immediately turn off the oven and disconnect the power supply. Do not attempt to force the door open or use commercial cleaners, as this can damage the oven’s finish. Check the owner’s manual to ensure all settings were correct. If the issue persists, contact a qualified technician for professional assistance. Avoid using the oven until it is serviced to prevent further damage or safety hazards. Always follow the manufacturer’s guidelines for troubleshooting to maintain the oven’s performance and longevity. If unsure, consult GE Appliances support for specific instructions tailored to your model.
When to Call a Technician
If the self-cleaning cycle fails to complete or the oven malfunctions, it’s essential to call a qualified technician. This includes scenarios where error codes appear, the oven emits unusual odors or smoke, or the door does not unlock after cooling. Do not attempt DIY repairs, as this could void the warranty or cause further damage. Contact GE Appliances support for guidance and to schedule a service visit. Always ensure the technician is authorized by GE to maintain the oven’s warranty and performance. If unsure about the issue, professional assistance is recommended to resolve it safely and effectively.