
Sauder furniture, known for its quality and style, often requires assembly. Clear instructions are crucial for a smooth process. This guide provides an overview of the necessary steps, tools, and tips to ensure successful assembly. Proper assembly ensures safety, stability, and longevity of your Sauder furniture. Always refer to the official Sauder assembly instructions PDF for specific models. Additional resources like videos and customer support are available if needed. Follow the manual carefully to avoid damage and ensure a professional finish.
1.1 Overview of Sauder Furniture and Assembly Requirements
Sauder furniture is renowned for its high-quality, stylish designs that cater to various home and office needs. Their products, such as bookcases, dressers, and desks, often require assembly due to their modular construction. Assembly typically involves basic tools like screwdrivers and hammers, with clear instructions provided in PDF manuals. Sauder furniture is made from durable materials like engineered wood, ensuring longevity. Proper assembly is essential for safety, stability, and maintaining the product’s aesthetic appeal. The instructions are designed to guide users through each step, ensuring a seamless experience.
1.2 Importance of Following the Instruction Manual
Following the Sauder assembly instructions PDF is crucial for ensuring a successful and safe assembly process. The manual provides detailed, model-specific guidance, including part identification, hardware usage, and step-by-step instructions. Deviating from the instructions can lead to improper assembly, instability, or damage to the furniture. By adhering to the guide, users can avoid common pitfalls and ensure their Sauder furniture is both functional and aesthetically appealing. Proper assembly also extends the product’s lifespan and maintains its structural integrity.
Preparing for Assembly
Before starting, gather all necessary tools, materials, and instructions. Ensure a clean, flat workspace and review the Sauder assembly instructions PDF to understand the process.
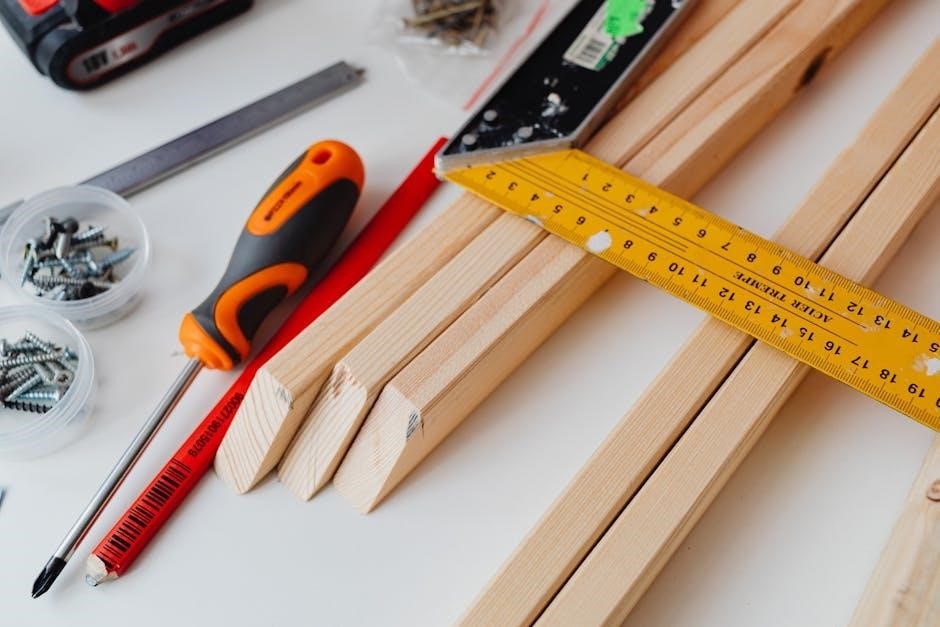
2.1 Tools and Materials Needed for Sauder Furniture Assembly
Ensure you have all required tools and materials before starting. Common tools include a screwdriver, Allen wrench, and rubber mallet. Some models may need a hammer. Check the Sauder assembly instructions PDF for specific requirements. Gather all hardware like screws, bolts, and dowels. Organize parts and hardware to streamline the process. Refer to the manual for exact quantities and types of materials needed. Proper preparation ensures efficiency and reduces assembly time. Always verify the list of tools and materials in the provided instructions for your specific model.
2.2 Understanding the Assembly Process and Time Estimates
Understanding the assembly process involves reviewing the Sauder instructions PDF to grasp the sequence of steps and complexity. Estimate assembly time based on the model and number of components. Simple pieces may take 30 minutes, while larger items like dressers or bookcases require several hours. Familiarize yourself with the process to avoid delays. Watching assembly videos can provide additional clarity. Organizing parts and hardware beforehand saves time. Allocate a dedicated workspace to ensure efficiency. Time estimates vary by model, but preparation and careful planning ensure a smooth assembly experience.

Navigating the Sauder Assembly Instruction Manual
The Sauder assembly instructions PDF provides clear diagrams and part lists. Review the manual to understand the assembly sequence and identify hardware. Use the parts identification section to match components with the instructions. Follow step-by-step guides for accuracy. The manual is organized by sections, making it easy to locate specific assembly steps. Visual aids and detailed descriptions ensure clarity. Familiarize yourself with the layout to navigate effortlessly and complete the assembly efficiently.
3.1 How to Read and Interpret the PDF Instructions
Reading Sauder assembly instructions requires attention to detail. Start by reviewing the table of contents to locate relevant sections. Pay attention to diagrams and part lists, which guide you through assembly. Use the index to find specific components or steps. Instructions are typically divided into numbered sections, with corresponding images. Highlight or underline key steps to avoid confusion. Familiarize yourself with symbols and abbreviations used in the manual. Cross-reference parts with packaging labels to ensure accuracy. Troubleshoot common issues by referring to the dedicated section. This structured approach ensures clarity and efficiency during assembly.
3.2 Identifying Parts and Hardware Supplied
Identifying parts and hardware is essential for efficient assembly. Sauder instructions include detailed lists and diagrams of all components. Cross-reference each item with the packaging labels to ensure no parts are missing. Hardware kits often contain screws, bolts, and fasteners, each labeled for specific use. Use the provided inventory checklist to verify quantities. Organize parts by type or assembly stage to streamline the process. This step prevents delays and ensures all necessary items are readily available when needed during assembly.

Step-by-Step Assembly Guide
A step-by-step guide ensures clarity and efficiency. Start with unpacking and inventory. Follow numbered instructions for each component, using labeled diagrams. Begin with the base, then build upward, securing hardware as directed. Align parts carefully to avoid misfitting. Use tools like screwdrivers and wrenches for precise adjustments. Double-check each step before moving forward. For complex models, refer to specific tutorials or videos for additional guidance. This methodical approach guarantees a sturdy and professional finish.
4.1 Assembly of Specific Sauder Furniture Models (e.g., Bookcases, Dressers)
Assembling Sauder furniture models like bookcases or dressers requires attention to detail. Begin by unpacking and organizing parts. Start with the base or frame, ensuring proper alignment. Use the provided hardware, such as cam locks or bolts, to secure shelves or drawers. Follow the PDF guide’s diagrams for accurate placement. For dressers, attach drawer slides before installing drawers. For bookcases, assemble sections separately and stack them. Ensure all pieces are level and tightened firmly. Refer to model-specific instructions for unique features, like adjustable shelves or door hinges. Double-check each step to ensure stability and functionality.
4.2 Tips for Handling Complex Assembly Steps
Complex assembly steps often require patience and precision. Start by thoroughly reviewing the instructions and diagrams. Organize parts and hardware beforehand to avoid confusion. Use the correct tools, such as Allen wrenches or screwdrivers, as specified. For components like drawers or shelves, ensure proper alignment before securing them. If a step feels unclear, refer to troubleshooting guides or video tutorials. Double-check tightness of bolts and cam locks to prevent wobbling. Address any misalignments immediately to avoid disassembly later. Taking your time and following each step methodically will help tackle even the most challenging parts of the assembly process effectively.

Common Challenges and Solutions
Common challenges include misaligned parts and loose joints. Solutions involve consulting the manual, using correct tools, and seeking help from Sauder customer support when needed.
5.1 Troubleshooting Common Assembly Issues
Common assembly issues include missing parts, misaligned pieces, and hardware malfunctions. Start by double-checking all components against the parts list. Ensure proper alignment by following the diagram step-by-step. If hardware is loose, tighten it firmly but avoid over-tightening. For stuck parts, gently tap or use a rubber mallet. Consult the Sauder instruction manual for specific guidance, and refer to online resources or customer support for additional troubleshooting tips. Patience and careful attention to detail often resolve most problems efficiently.
5.2 Adjusting Hardware and Ensuring Stability
Adjusting hardware is crucial for stability and proper functionality. Tighten all screws and bolts firmly, but avoid over-tightening. Use an Allen wrench or screwdriver as specified. For drawers or doors, align them carefully and adjust hinges if necessary. Ensure shelves are level and securely fastened. Check the furniture’s legs on uneven surfaces and use shims if needed. Refer to the Sauder assembly instructions PDF for specific hardware adjustments. Regularly inspect and tighten loose parts to maintain stability and prevent wobbling over time.
Safety Precautions and Best Practices
Always wear protective gloves and eyewear during assembly. Work in a clear, well-lit area to avoid accidents. Use correct tools to prevent damage and injury. Follow the manual closely for safety guidelines. Ensure stability before placing heavy items. Avoid over-tightening hardware. Keep children away from assembly areas. Plan carefully to prevent mistakes. Patience ensures both safety and successful assembly.
6.1 Safety Guidelines for Assembly
Always wear protective gloves and eyewear to prevent injuries. Ensure the workspace is clear and well-lit to avoid tripping hazards. Use the correct tools as specified in the manual to prevent damage or harm. Keep loose clothing tied back and long hair tied up. Avoid using power tools near children or pets. Ensure all parts are stable before handling to prevent accidental tipping. Never over-tighten hardware, as this can weaken the structure. Follow all safety precautions outlined in the Sauder assembly instructions PDF to ensure a safe and successful assembly process.
6.2 Avoiding Damage to Furniture and Surroundings
To prevent damage, handle all parts with care, avoiding drops or scratches. Place protective pads or cloth on your work surface. Use the correct tools to avoid marring surfaces. Ensure all components are aligned properly before securing them. Avoid over-tightening, as this can strip screws or crack wood. Keep the assembly area clean to prevent losing small parts. For large pieces, assemble near the intended location to avoid moving heavy items. Follow the Sauder assembly instructions PDF for specific handling tips, especially for fragile or finished surfaces.
Additional Resources for Assembly Assistance
Access Sauder assembly instructions PDFs on their official website. Utilize video tutorials on YouTube for visual guidance. Contact Sauder customer support for personalized assistance or lost manuals.
7.1 Accessing Sauder Assembly Videos and Tutorials
Sauder offers assembly videos and tutorials on platforms like YouTube and their official website. These resources provide step-by-step guidance for complex furniture models, such as bookcases and dressers. Videos often cover tricky steps, ensuring clarity and confidence. Platforms like Prime Spaces host tutorials for models like the Sauder 3-Shelf Bookcase. Experts, such as Jenna Glavan, share tips and tricks for a seamless assembly experience. These visual aids complement the PDF instructions, making assembly more accessible and user-friendly for all skill levels.
7.2 Contacting Sauder Customer Support for Help
If you encounter difficulties during assembly, Sauder offers customer support to assist. Locate the bar code label on the product packaging and follow the instructions to request a replacement manual. ManualsLib also hosts Sauder manuals, providing easy access to PDF guides. For further assistance, contact Sauder directly through their official website or support channels. Their team is available to address questions and provide solutions, ensuring your assembly process is smooth and stress-free.
Properly assembling Sauder furniture ensures stability and functionality. Follow instructions carefully, and don’t hesitate to seek help if needed. Enjoy your durable and stylish furniture!
8.1 Final Tips for Successful Assembly
For a seamless assembly experience, organize all parts and tools beforehand. Double-check each step and tighten hardware securely. If stuck, refer to online tutorials or contact Sauder support. Patience and attention to detail ensure a sturdy, professional finish. Remember, proper assembly enhances safety and durability; Take breaks if needed, and assemble in a spacious area. Your effort will result in beautiful, functional furniture that lasts. Always follow the Sauder assembly instructions PDF for the best outcome.
8.2 Benefits of Properly Assembled Sauder Furniture
Properly assembled Sauder furniture ensures stability, safety, and longevity. It prevents wobbling and structural issues, enhancing overall durability. Correct assembly also maintains the aesthetic appeal, as all parts fit seamlessly. This attention to detail ensures your furniture remains functional and visually appealing for years. Additionally, proper assembly prevents potential safety hazards, especially for families with children or pets. By following the Sauder assembly instructions PDF, you achieve professional results, ensuring your furniture stands the test of time and meets its full potential.